Why Ackermann is so important when it comes to drifting?
By changing Ackermann setup you can radically change how the leading and trailing wheel will perform when you are sideways in a corner with your driftcar. Where correct amount of reverse Ackermann will give you minimal scrub and maximum speed but make the car also nerveous and more difficult to drift at high lock. And there is no ideal setup which would work always the same way on every chassis, driver and driving style.
So finally the „right“ amount of Ackermann depends on car model, driving style and drivers preference. On most of the Wisefab front drift knuckles Ackermann is adjustable to finetune it closer to „right“ amount.
Wisefab has two types of Ackermann washers available. One of them are for welded knuckles like Nissan S13, Nissan S14, BMW E92, Nissan Skyline R33 and the other type is for the milled knuckles like Toyota GT86, Subaru BRZ.
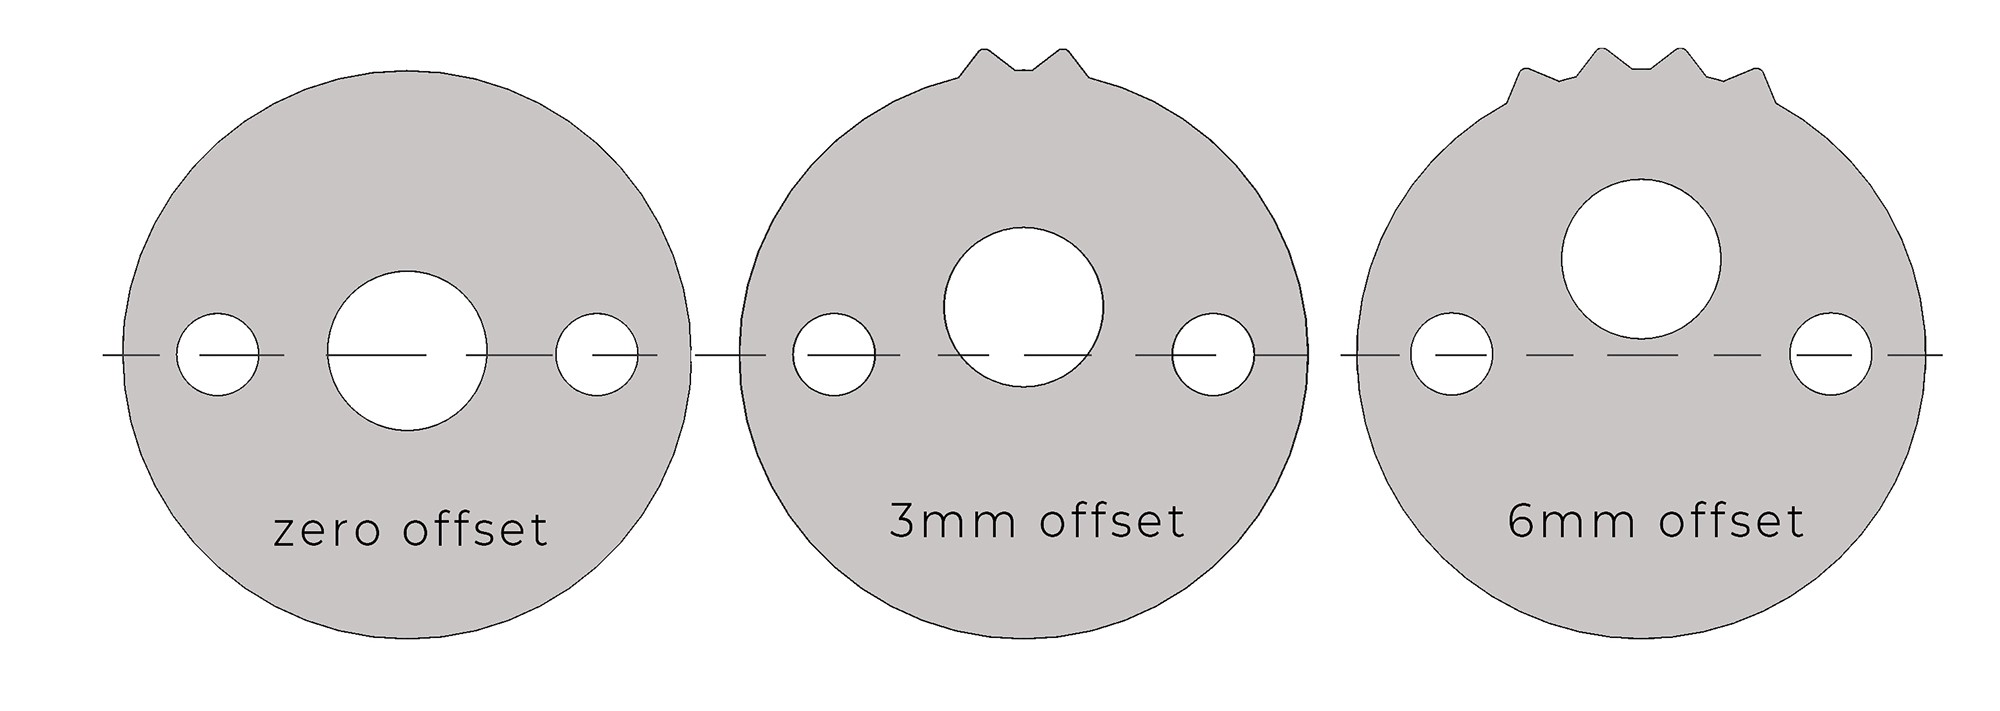

As you can see the two types of washers have different offsets. The bump on the round ones and the notch on the square one means the offset of this washer. Every bump/notch is equal of 1.5mm offset.
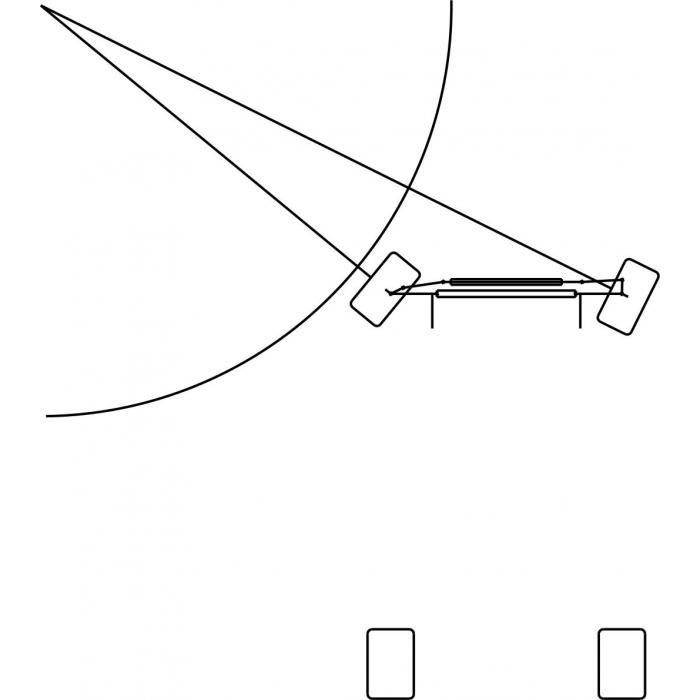
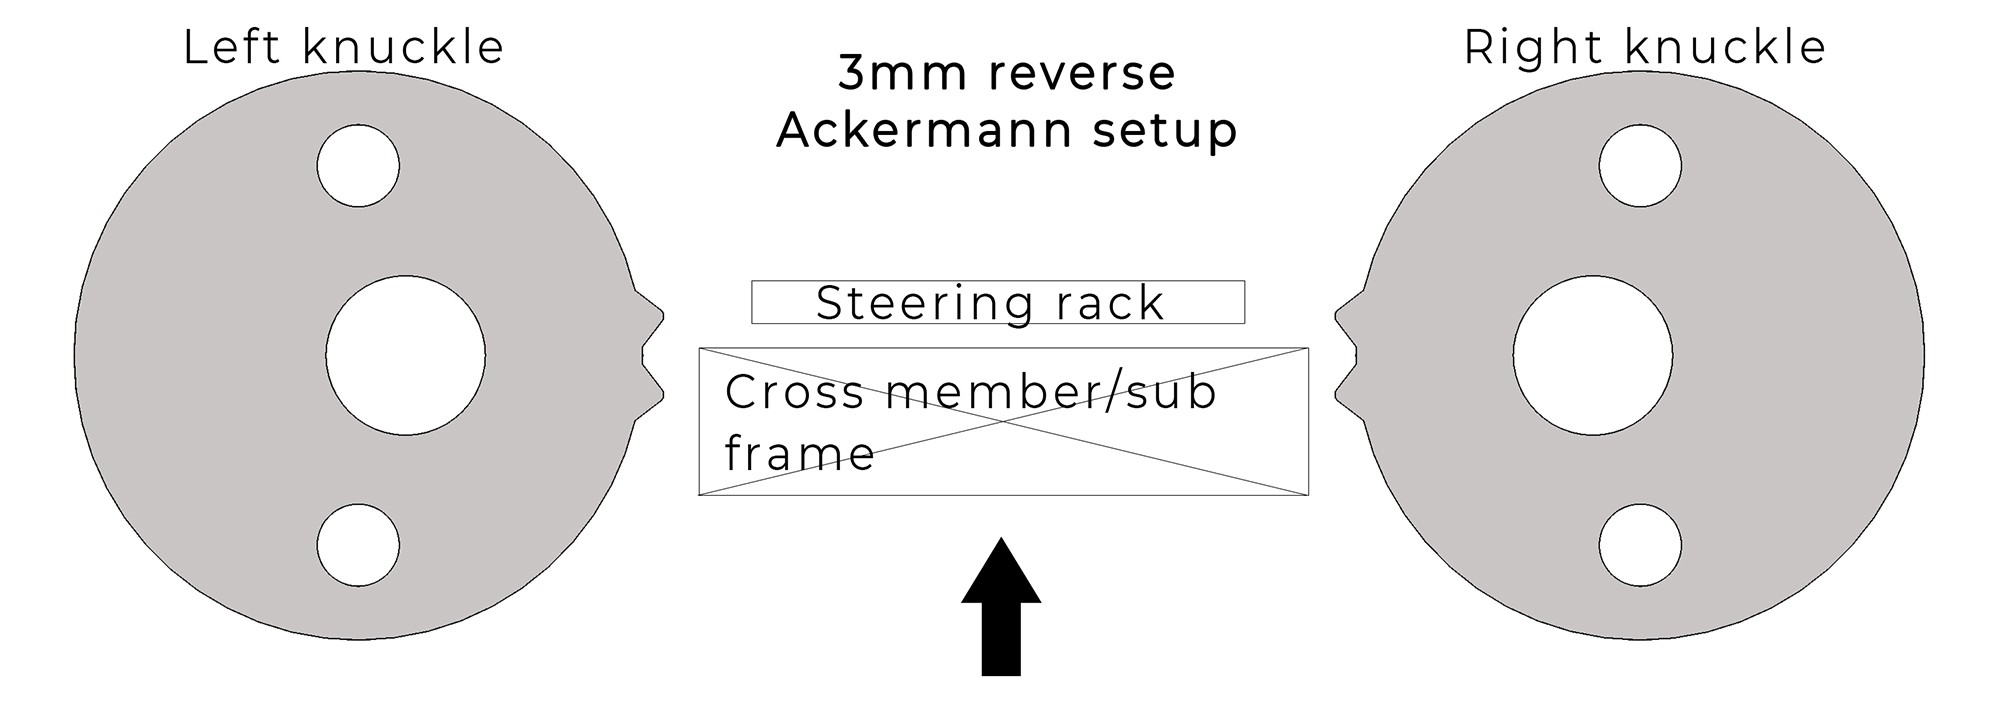
There are chassis with front steering rack and rear steering rack. Front steering rack means that the steering rack is in front of the subframe like BMW e90/91/92 etc. And the rear rack is vice versa like on the Nissan 350Z or other Nissans. This means that in order to achive positive or revers Ackermann it is important to place to washers correctly. Lets take a look at front streering rack setup.
Front steering rack
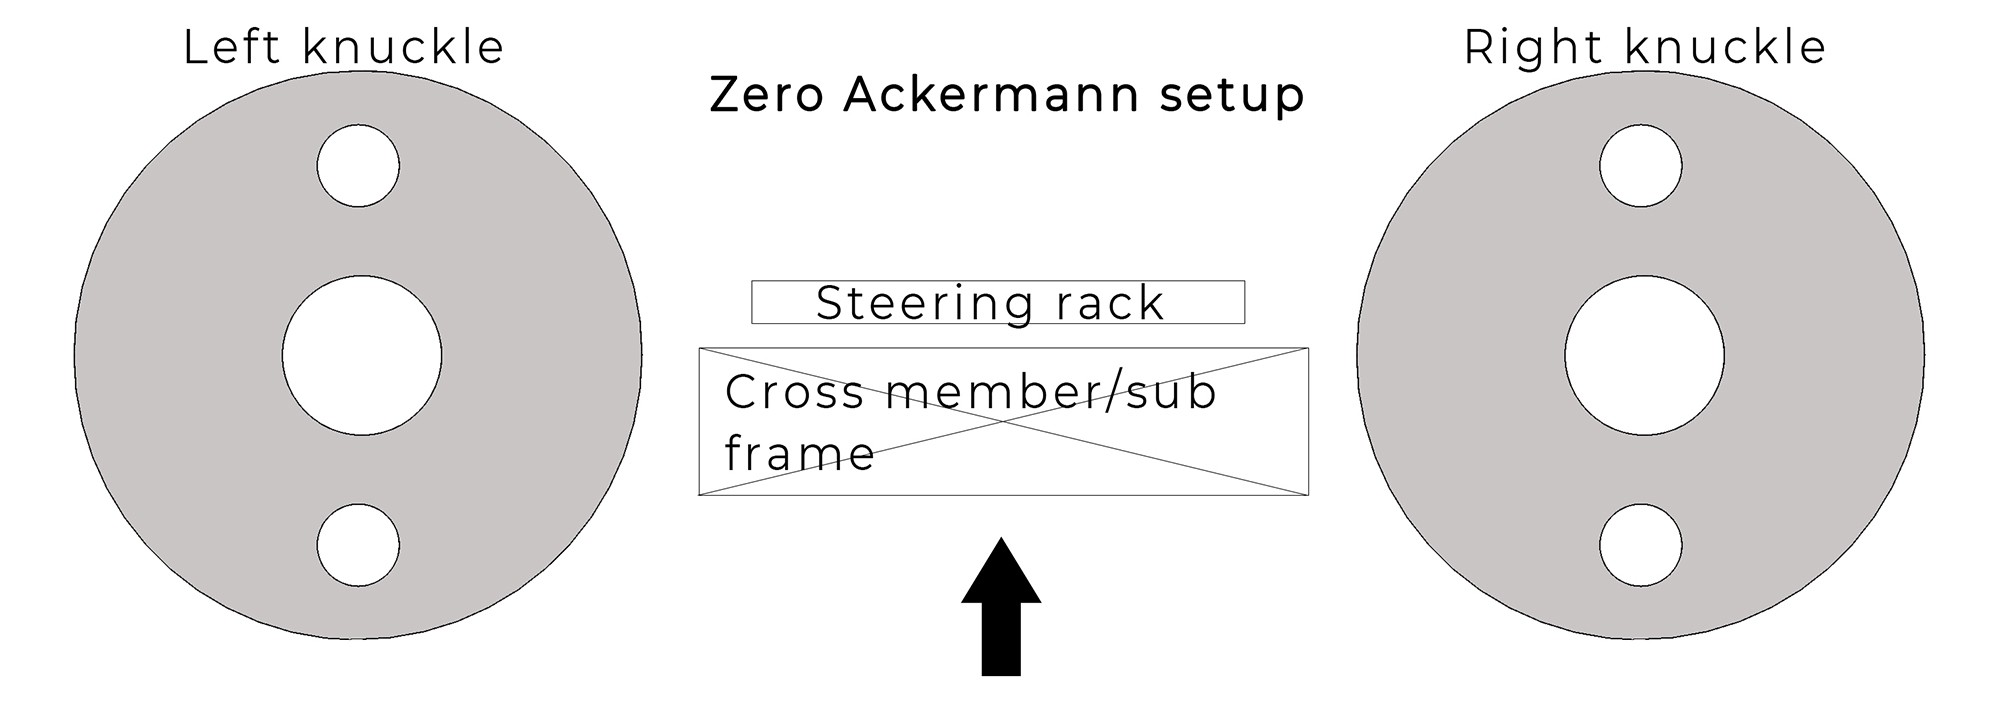
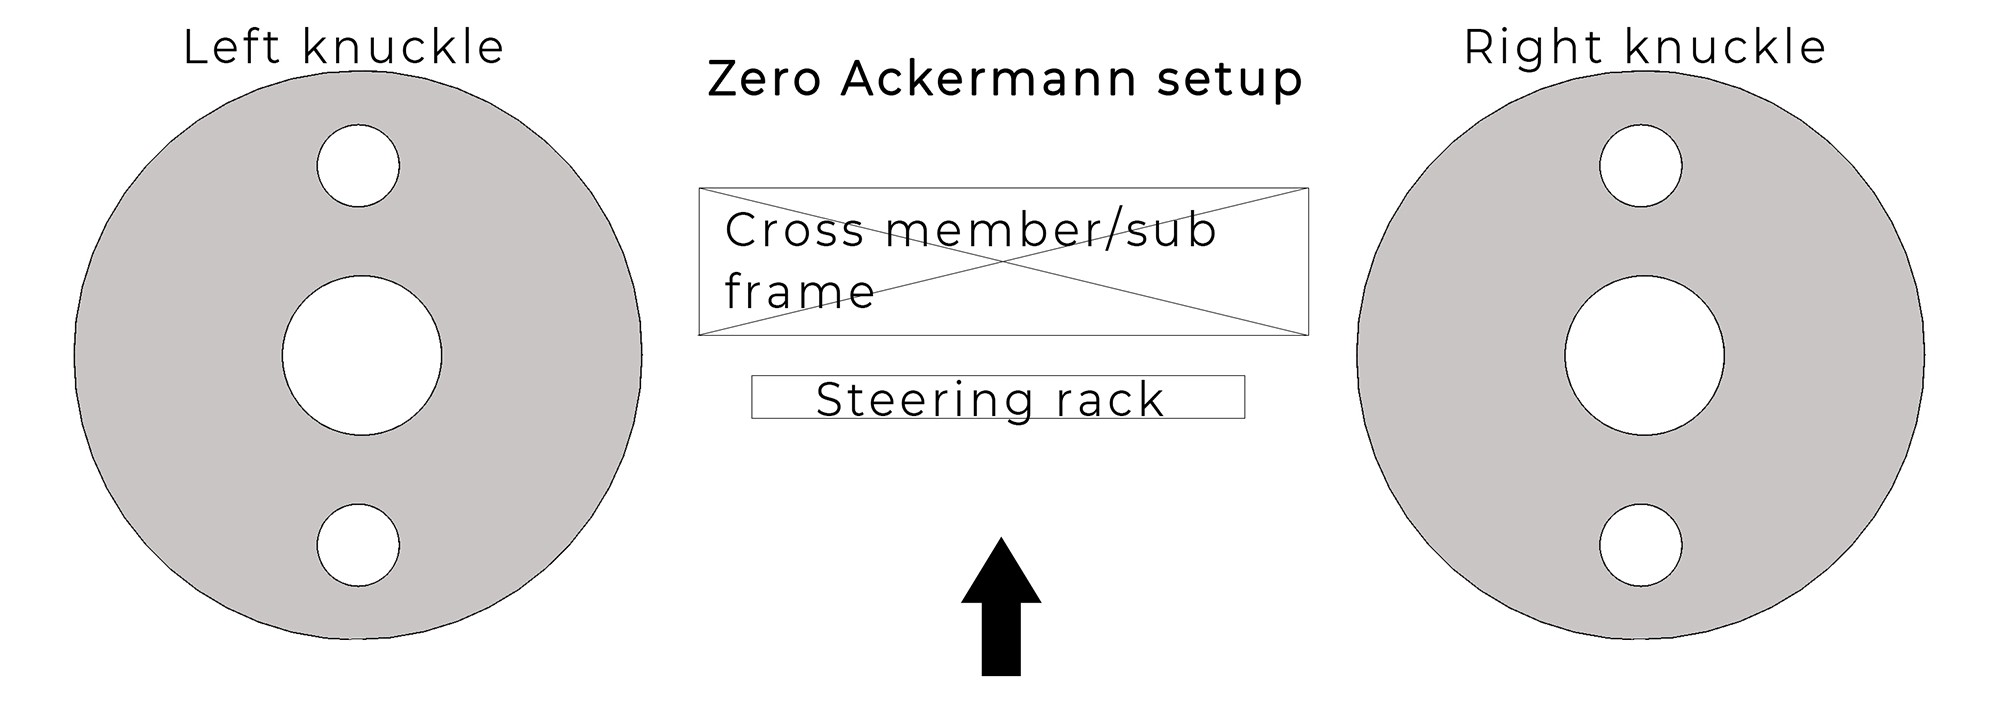
This is the Zero Ackermann setup. We are going to use the round washers for this how to article. This arrow on the picture is the direction of drive. You can learn about different Ackermann setups our next post "Everything you need to know about Ackermann in drifting". Featured below in the related post section.
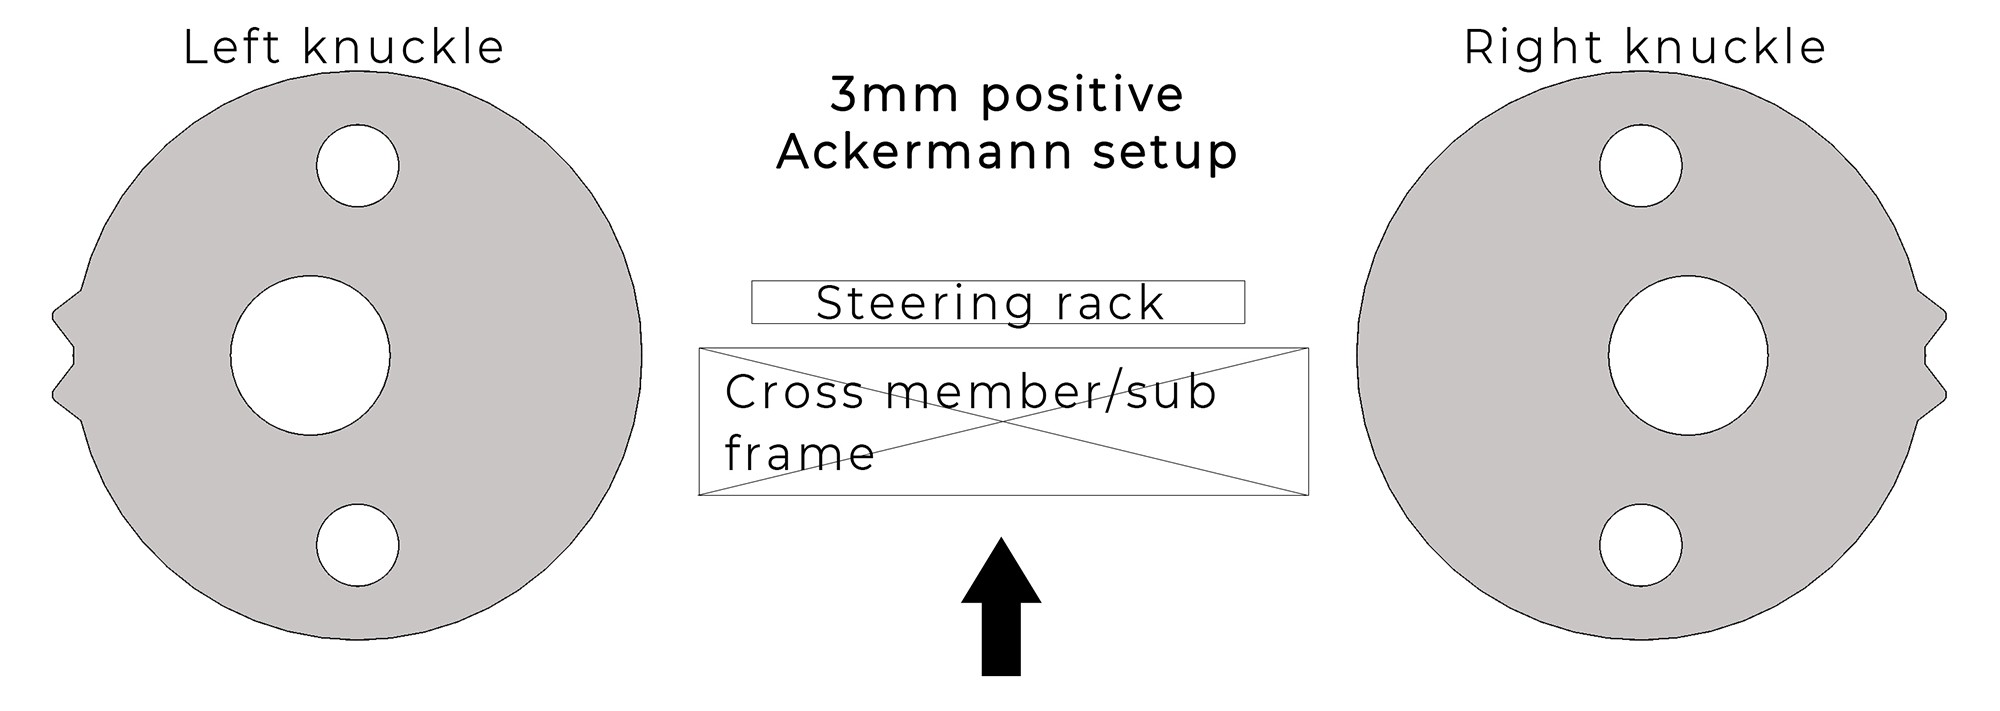
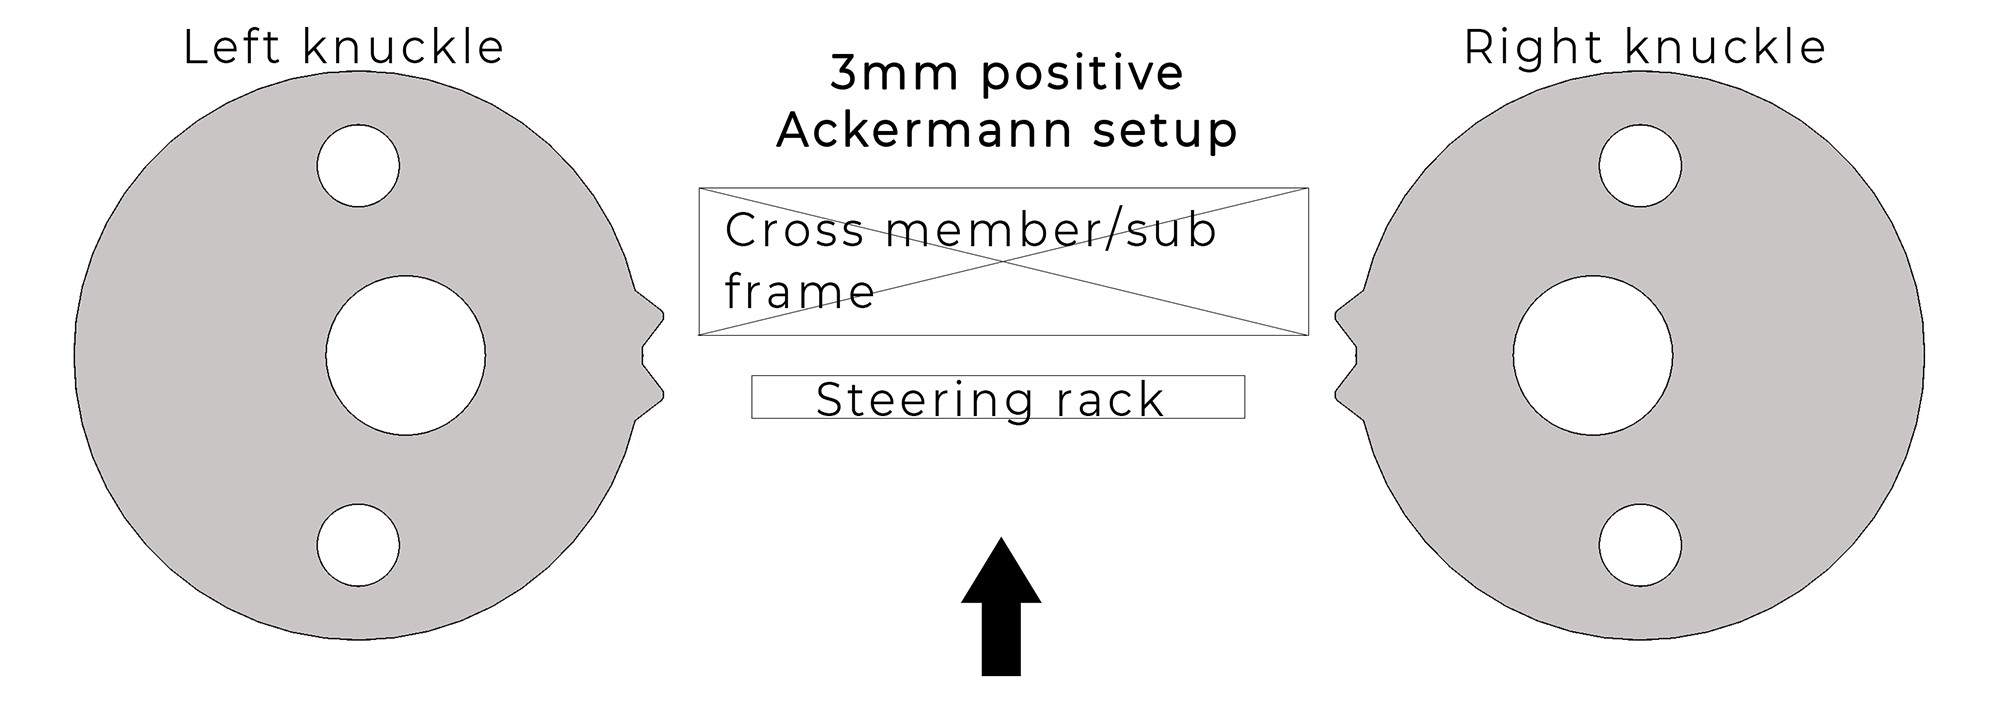
Here we can see the 3mm positive Ackermann setup where steering rack is locatad in front of the subframe the bumps/notches on the washers must face apart of each other in order to achive positive Ackermann setup.
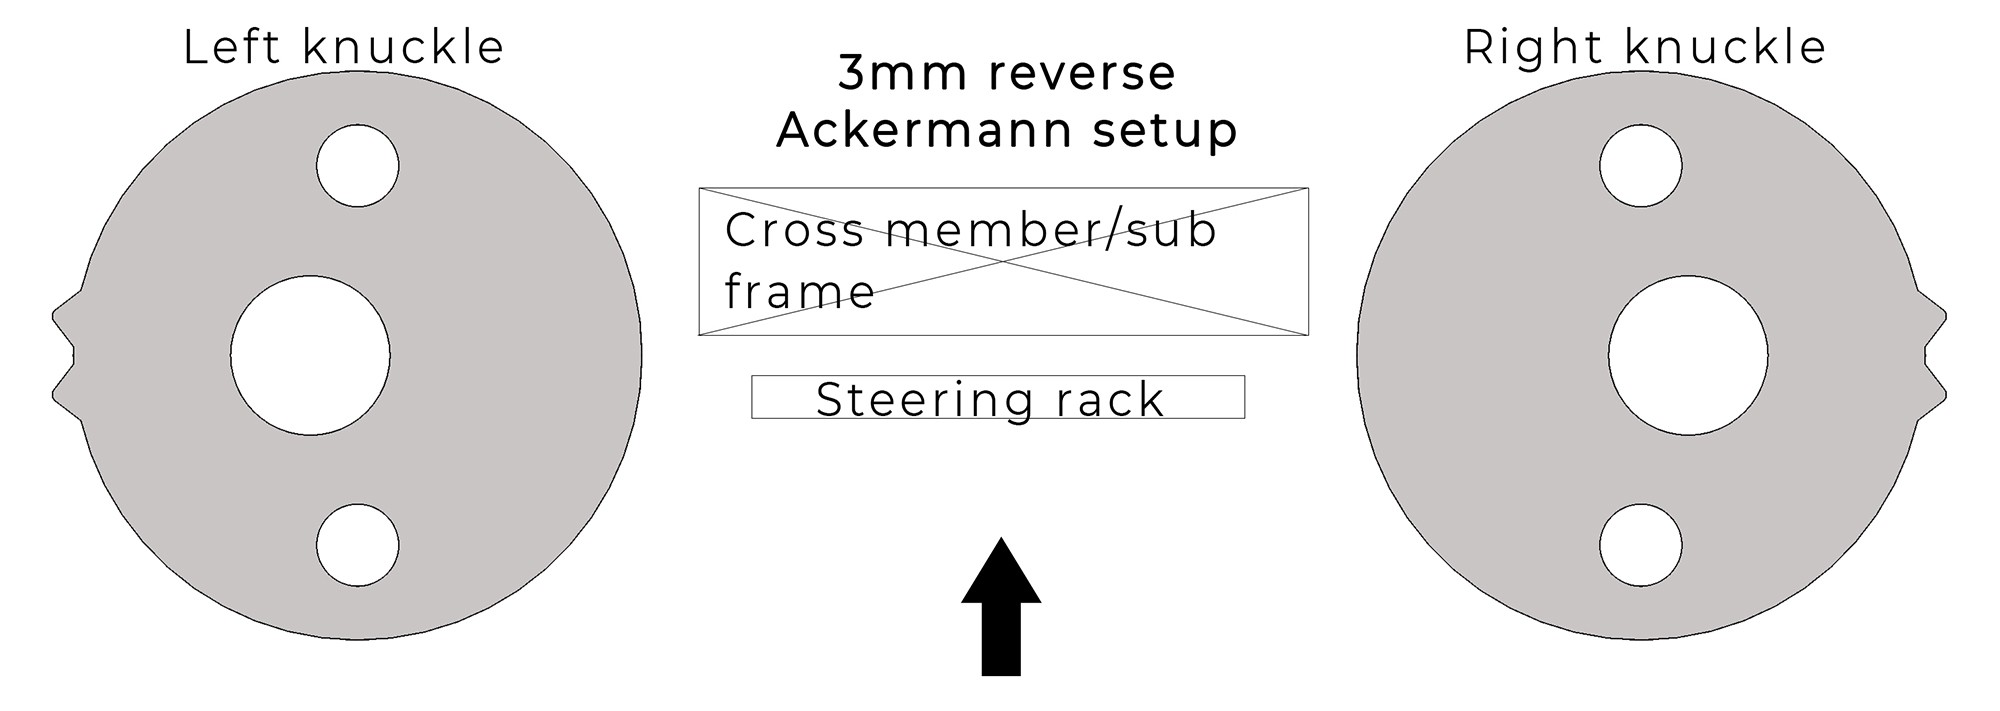
By flipping the washers around where the bumps/notches are facing in the middle of the car you have the reverse Ackermann setup. The same rule applies on 6mm offset washers.
But when I have zero Ackermann setup and want to apply 6mm positive Ackermann on my BMW e92 I would have a huge toe in you might say. You are right. This is where the offset bumps and notches come into play. Zero Ackermann to 6mm positive Ackermann means that you need to make your tierods longer by 6mm per side. Which is exactly four full turns longer on your tierods. Because the threat picth is 1,5mm per turn. Which means that each full turn will make the tie rod longer or shorter depending on which direction you will turn it.
This rule applies on reverse Ackermann but there you will need to shorten the tierods the amount of offset you want to use. The simplicity of this system grants you the possibility to change to different setups between runs on the track. You can easily find the most suitable Ackermann setup on a test day.
Rear steering rack
You can now see that steering rack is behind/rear of the subframe. In general the same rules apply but everything is vice versa. Lets take a look.
In order to set up the positive Ackermann on a rear steering rack like it is on Nissan 350Z, Nissan S13, Nissan S14 etc. You need to point the bumps/notches inwards of the car and shorten the tierods. If you skipped the previous part of this article you might ask how much and the answere is 3mm per side which is two full turns on the tierods and you can do this without alignment bench between runs on your test/practice day.
Lets take a look at reverse Ackermann now.
Lets make an example on Nissan 350Z and you have zero Ackermann which you set up on an alignment bench and want to try out the 3mm positive Ackermann on your practice day. You take the two bump washers and install them on the knuckle... which direction must the bumps face?
Thats right, inwards of the car! And how much and which way you need to adjust the tierods? By installing the washers you would have a 3mm per side toe in. This means that you need to shorten the tierods by 3mm per side and this is two complite turns. Mark the position with a white marker and turn the tierods two complite turns shorter. You do not even need a measuring tape to do this. Because the tirerod threat pitch is 1,5mm per turn.
Conclusion
Wisefab Ackermann washers enable a quick and convenient way to try out different Ackermann set ups with out an alignment bench. Give it a try on you next practice day. You can learn about zero, positive and revers Ackermann in the related article. You will gain the knowledge about Ackermann and how to use this.